

Update: This method was designed for Unreal Engine 4. UE5 now has much better ways of accomplishing the same thing, and World Composition is deprecated.
This is a method I’ve come up with which works quite well for creating sky islands in Unreal. I experimented with using Landscapes, with meshes for the underside, but the edges were incredibly finicky. After a lot of experimentation, I came up with this method which takes advantage of heightmaps, and still allows for the performance increase of World Composition in Unreal.
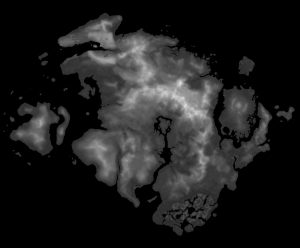
First off we need a heightmap. These can be baked from a custom mesh in Blender, found online, or even pulled directly from Google Maps. Here’s the one I’m using in this demonstration:
In Blender, create a plane, and subdivide it a number of times. Add a Subdivision Surface modifier to get even more detail (Set it to Simple, as we don’t need the corners rounding).
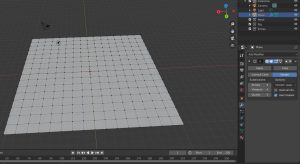
Add a Displace modifier, and create an Image Texture to displace the mesh by.

Change Texture Coordinates to UV to make the heightmap fill the plane, rather than repeat endlessly across it. Adjust the Strength of the Displace modifier as needed.
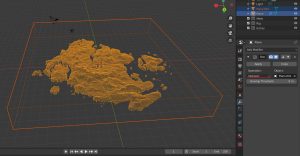
Apply both modifiers, (Subdivision Surface first, then Displace)
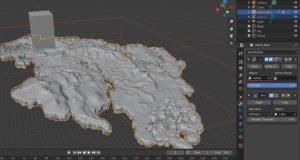
Next, you need to make a massive cube to cover your island. Give the Island a Boolean modifier, and set it to Intersect with the cube object. Move the cube as needed to slice off the bottom of your heightmap, making the island appear to be floating in the sky.
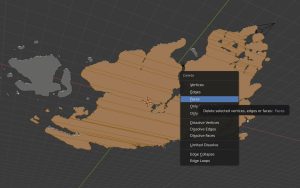
The boolean operation will have created faces on the underside of the islands, where the cut took place. Those faces need to be deleted. You can either select them all manually, or select one of them, and press Shift+G, then Normal to select all faces on the object that are pointing the same direction (down).
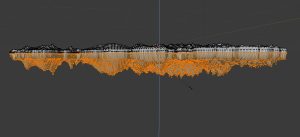
Next, with the whole object selected, Extrude it, and scale it at least -1 on the Z axis, to get this mirrored effect. I tend to like the bottom of the islands to be scaled “taller” than the top.
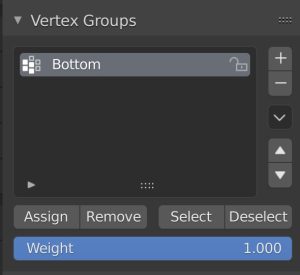
With all those vertices conveniently selected, create a new vertex group, and assign those vertices to it.
Next, create a Decimate modifier, and a Displace modifier. Set them both to only affect the vertices in that vertex group we just made. Decimate should be triangulating, and be reducing the mesh somewhat, Displace should have some clound or noise texture to roughen up the underside of the islands. The idea with this is to make the bottom even less symmetrical with the top, while still maintaining the seam along the edge of the island.
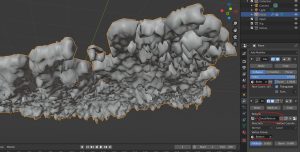
After these modifiers have been applied, add a Remesh modifier, set to Smooth mode, and Smooth shading. Those previous operations completely destroyed any good topology we had, and this will mostly clean that up for us. When you’re happy with how it looks, Apply that modifier. (Note that it’s good to check if there’s any non-manifold topology by going in Edit Mode to Select\SelectAllByTrait\NonManifold)

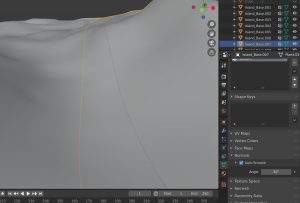
Now would also be a good time to assign different materials to different sections, if you want to. I have a Triplanar material for the bottom, and another one for the Top. But one Triplanar material across the whole thing works as well.
Now would also be a good time to set the Island’s Normals to Auto-Smooth. Between the Normals, and the Triplanar map, the seams between the islands won’t be visible.
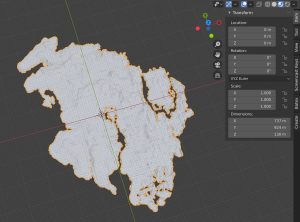
The island should now be scaled to some proportion of what it’ll be in-engine. You don’t have to scale it up to it’s full size (If you do, you’ll probably have to adjust your View Distance in Blender), but just be aware of what you’ll need to scale it by in Unreal. I scaled mine up all the way, which resulted in some shading artifacts in Blender.
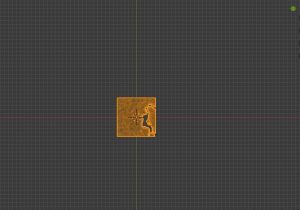
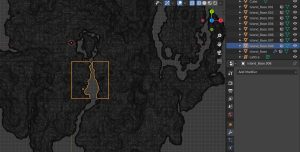
Now we need to make a giant cube again. This cube will be what we’ll use to slice the mesh up into chunks for World Composition. I have mine set at 100mX100m chunks, because I’m working with it at full scale. The bigger the chunks are, the less cuts you’ll have, but you’ll have less control over the level loading in-engine.

Using a Boolean operator on the Island, the Cube will slice it into neat little cubes.
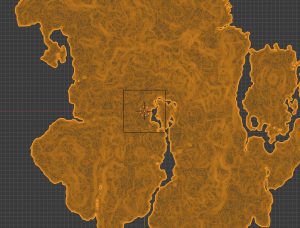
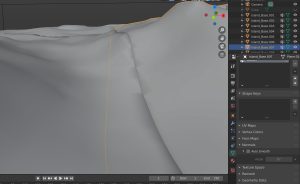
Before actually cutting though, something I found to help with the aesthetic is to add a Lattice Modifier to the island. Move the Lattice Modifier to be visually above the Boolean modifier. If you don’t do this, you may run into a few issues of seams not matching up properly. Create a Lattice object, and scale it as necessary in Object mode. Only move vertices around in Edit mode after the size is correct in Object mode. Moving the vertices of the Lattice will warp the Island mesh, allowing you to get some vertical variation.
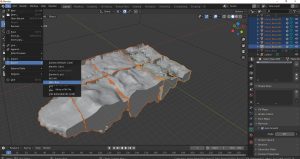
Now, since the Boolean modifier doesn’t create a copy of the mesh when it cuts it, we’ll need to duplicate the base Island mesh, and slice the duplicate. This process will be repeated for every Chunk.
Duplicate Basemesh Move Cube (in clear increments. My cube is 100×100, so I move it 100 at a time)
Apply the Lattice and Boolean modifiers on the duplicated Island.
Repeat
Once you have all your chunks cut, select them all, and export to FBX.
In Unreal, create a new folder for your map. Create a “Persistent Level”, and levels for each of the chunks. You can save those to a sub-folder if you prefer for organization’s sake. Make sure you have “Enable World Composition” checked in your World Settings tab.
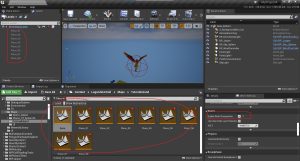
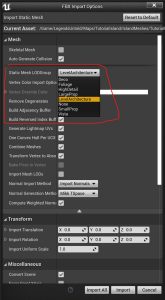
Next, import your .FBX with all your island chunks in it.
Uncheck “Combine Meshes” or they will all import as the same mesh.
Set the Static Mesh LODGroup to LevelArchitecture which will automatically create 4 Levels of Detail from the meshes.
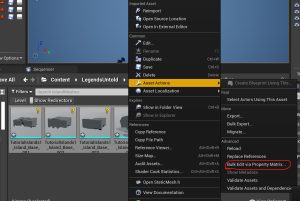
Once they’ve all imported, select them all, right-click, and navigate to Asset Actions/Bulk Edit.
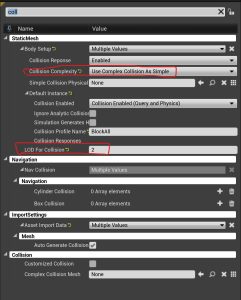
Search for Collision, and set the Collision Complexity to “Use Complex Collision as Simple”, which will help to use the actual mesh for collisions, instead of a bounding box.
Also, set the LOD to be used for those collisions to 2. (You can go into the objects and look at the LODs to see what they look like, but I found LOD 2 kept enough of the geometry for accurate collisions, without having a complex mesh)
Open each of your levels, and drag the appropriate mesh into that level. If you drag all the meshes into one level, you’re bypassing the whole point of using World Composition.
Then, select all the island chunks in the scene, and set their Locations to 0. Because of how we split them up, they remember their offset from the World Origin, and will line up perfectly.
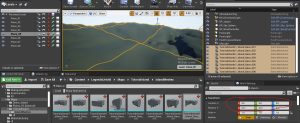
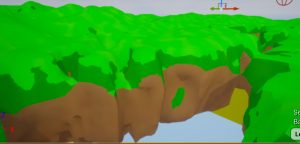
The only thing left to do is apply your materials (Hopefully not a blinding green one like this). Again, preferably use a Triplanar material, which will reduce the changes of any seams between islands being visible.
It’s a bit of a process, with a few steps requiring some tedious manual work (mostly cutting the meshes in Blender, and renaming them and such). It would be wonderful if there was a macro for doing all that. But for now, this is the workflow I’m using for creating mesh islands for use in Unreal.